Domain-level Identity Providers
A Domain-level Identity Provider (DL-IDP) is a server-level configuration that sets up an external identity provider for all users from a given domain. This identity provider will be used for all Fanoni applications the user logs into, including the Fanoni EHR. Domain-level providers are primarily used to ensure that all practitioners access Fanoni data via your corporate identity solution.
Once a DL-IDP is enabled for mydomain.com, any user that attempts to sign in with an email on that domain (name@mydomain.com) will be prompted to authenticate using the configured provider. Enabling DL-IDPs will apply to all emails at that domain, including dev accounts and name+text@mydomain.com type emails.
This guide demonstrates how to set up a DL-IDP, using Okta as an example provider.
Setting up DL-IDPs on the Fanoni Hosted instance requires an Enterprise account. If self-hosting, setting it up requires super admin privileges.
Example: Setting up Okta as a Domain-level Identity Provider
Okta Setup
Enabling Okta requires configuration on the Okta side and the Fanoni side. You will need to be an Okta admin to set up a App Integration on Okta.
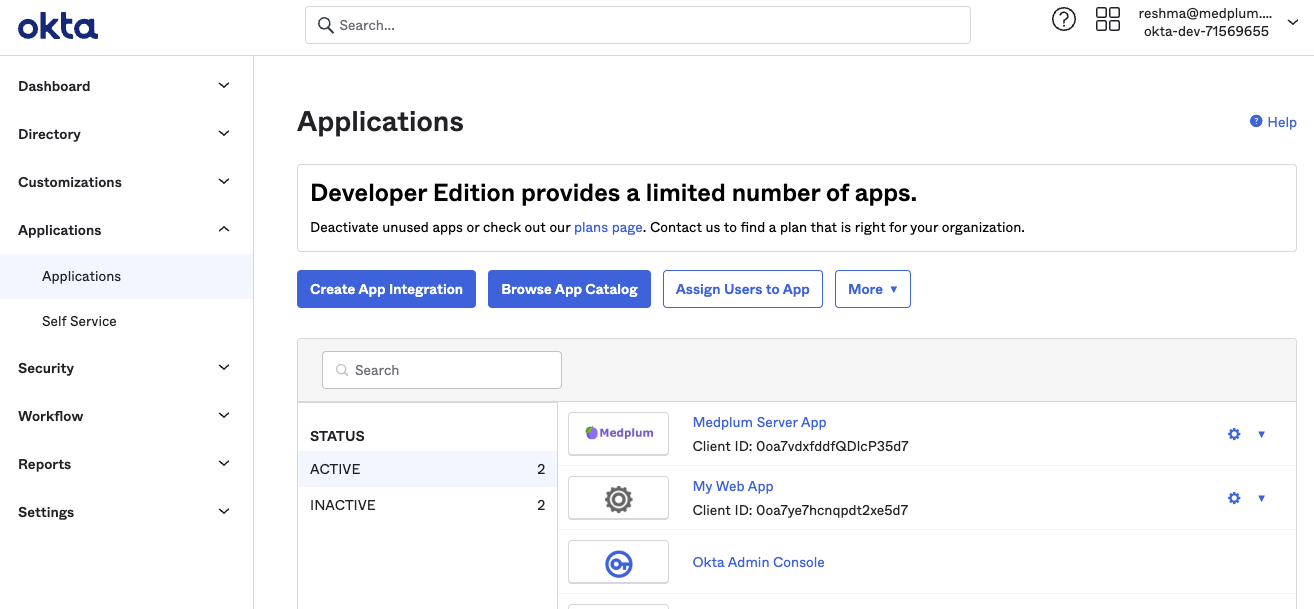
Click on "Create App Integration"
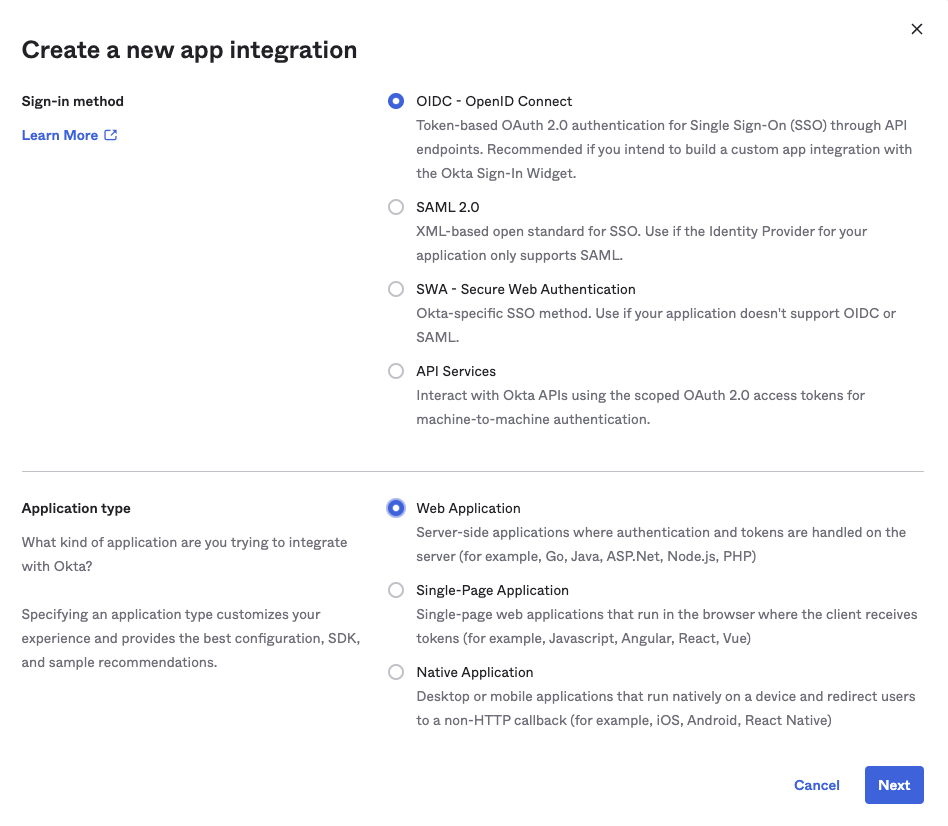
When prompted, choose "OIDC - OpenID Connect" and "Web Application". Click "Next".
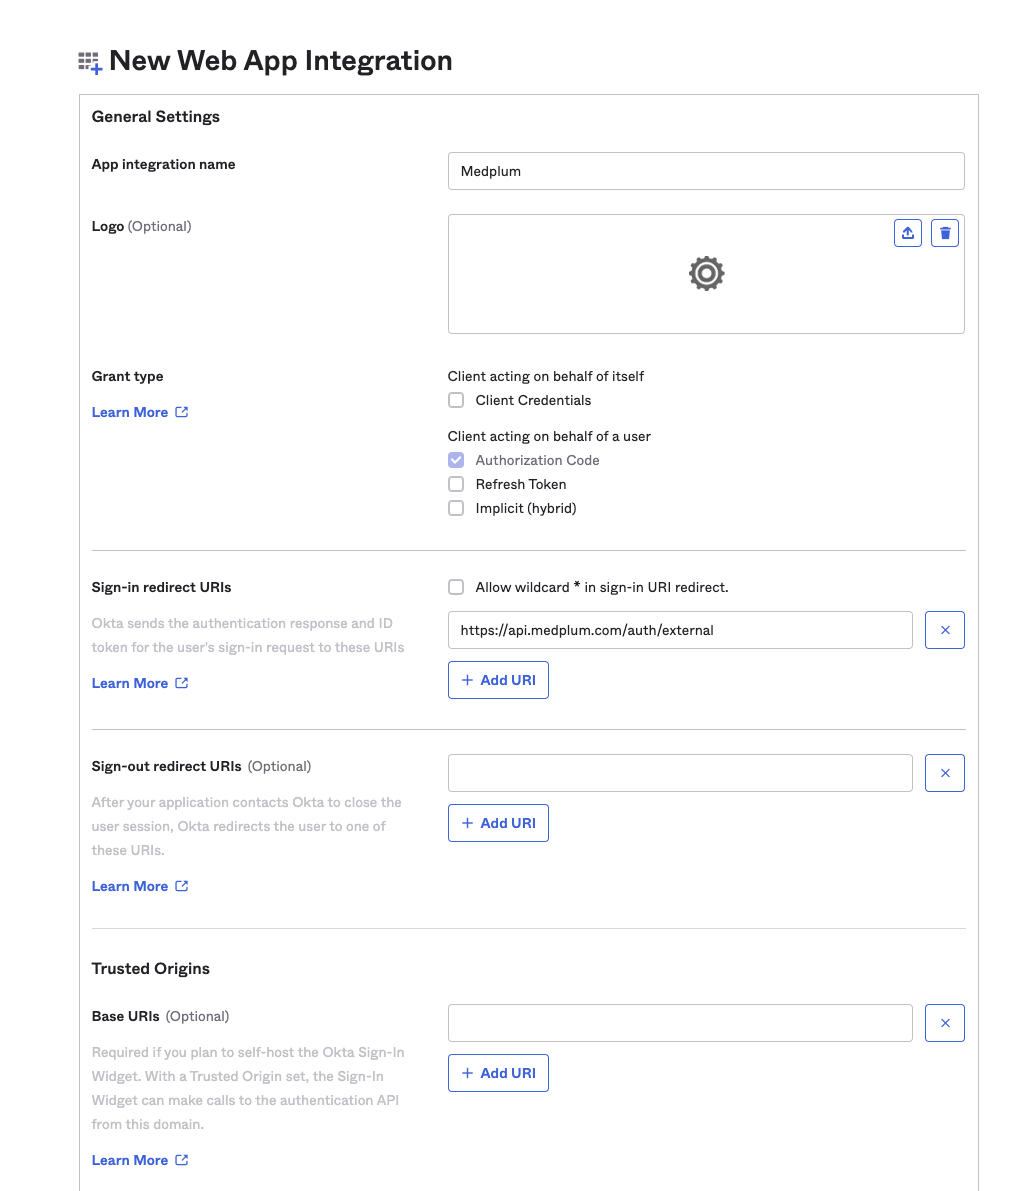
Use the following settings:
- App integration name: Choose your preferred name, or "Fanoni"
- Grant Type
- 🔲 Client Credentials - unchecked
- ☑️ Authorization Code - checked
- 🔲 Refresh Token - unchecked
- 🔲 Implicit (hybrid) - unchecked
- Sign-in redirect URIs
- 🔲 Allow wildcard - unchecked
- Callback URL - "{medplumApiServerBaseUrl}/auth/external"
- For example:
- Fanoni hosted apiServerBaseUrl is "https://api.medplum.com"
- So the callback URL is "https://api.medplum.com/auth/external"
- For example:
- Sign-out redirect URIs: Leave blank
- Trusted Origins: Leave blank
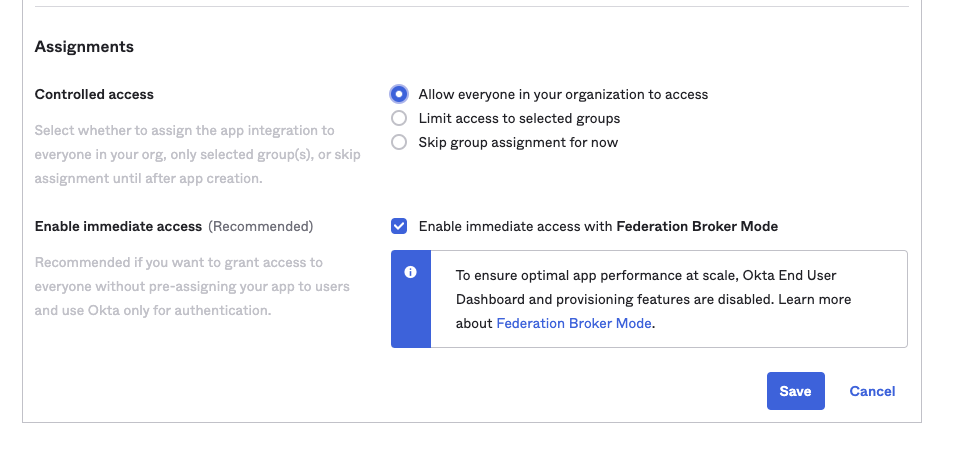
Scroll down to the Assignments section:
- Assignments
- Controlled access
- Choose the level appropriate for your organization
- We recommend "Allow everyone in your organization to access" as a an account on Fanoni is still required to be able to access
- ☑️ Enable immediate access - checked
- Controlled access
Then click "Save".
On the next page, note the "Client ID" and "Client Secret", take note of those - they will be needed for the Fanoni set up.
Fanoni Setup
To configure Okta as an external authentication provider, you will need 5 pieces of data:
- Authorize URL
- Token URL
- UserInfo URL
- Client ID
- Client Secret
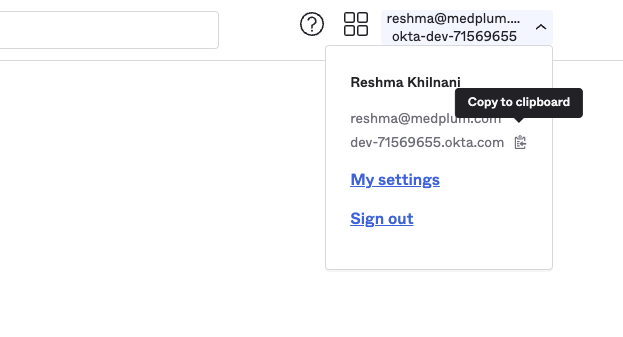
Okta uses separate domains per organization. You will need your organization's Okta server. This is called the Okta "baseUrl". You can find it in the top-left menu of the Okta admin panel by clicking on your name when logged in.
The "baseUrl" could look something like this https://dev-12345678.okta.com or could be a named subdomain like https://mydomain.okta.com. Once you have obtained it, construct the Authorize, Token and UserInfo URLs as follows:
- Authorize URL = ${baseUrl}/v1/authorize (e.g., "https://dev-12345678.okta.com/oauth2/v1/authorize")
- Token URL = ${baseUrl}/oauth2/v1/token (e.g., "https://dev-12345678.okta.com/oauth2/v1/token")
- UserInfo URL = ${baseUrl}/oauth2/v1/userinfo (e.g., "https://dev-12345678.okta.com/oauth2/v1/userinfo")
Client ID and Client secret will be the same as those obtained at the end of the previous section.
Create a DomainConfiguration resource:
- Add the values for the five elements above
- Leave "useSubject" unchecked
- Set the
domainfield to the users' email domain (e.g. "mydomain.com") in all lower-case. Once the resource has been saved, all new authentication requests from that domain will use Okta authentication.
Configuring a DL-IDP on the Fanoni Hosted service requires a Fanoni team member, contact us at hello@fanoni.ai to enable. For those self-hosting, setup below requires super admin privileges.